
Spotify Chapters From One Long Podcast
You do not need to split one podcast into many files to get Spotify chapters. I’d finish the edit, mark chapter start times on the final audio, add short titles, and paste those timestamps into the episode description or RSS chapter field.
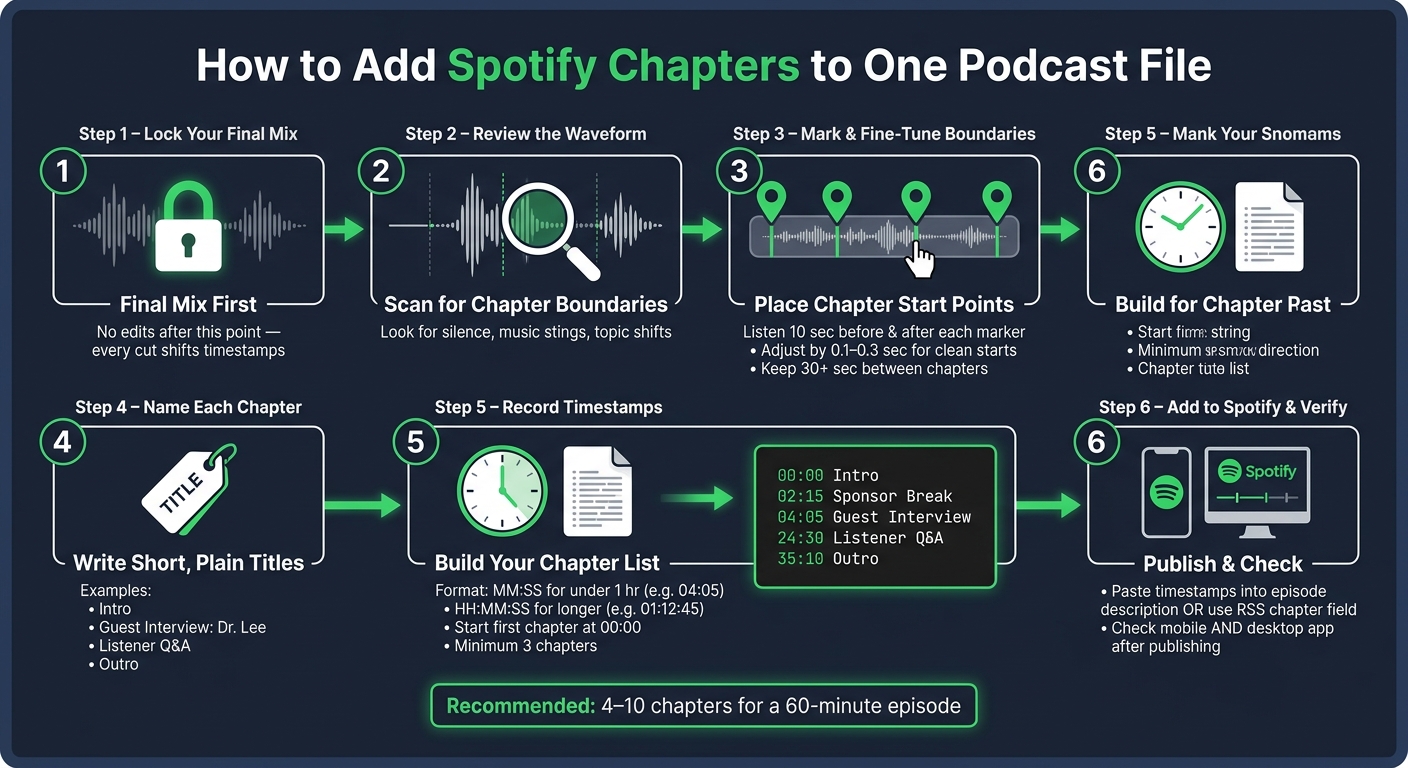
Here’s the whole process in plain English:
- Use one finished audio file
- Mark chapter starts after editing is done
- Make the first chapter
00:00 - List chapters in time order
- Keep at least 3 chapters
- Leave about 30+ seconds between chapters
- Use short, plain titles
- Check the live episode in Spotify after publishing
A 60-minute podcast will often work well with 4 to 10 chapters. That gives listeners enough skip points without turning the list into clutter. If you edit after making timestamps, even a 10–20 second change can throw later chapter times off.
I’d treat chapters as metadata, not audio edits. One file, one timestamp pass, one final check in Spotify.
How to Add Spotify Chapters to One Podcast File
How To Add Spotify Podcast Chapters / CLICKABLE Timestamps
sbb-itb-9696877
Review the Waveform and Mark Chapter Boundaries
With the final mix locked, use the waveform to place each chapter break.
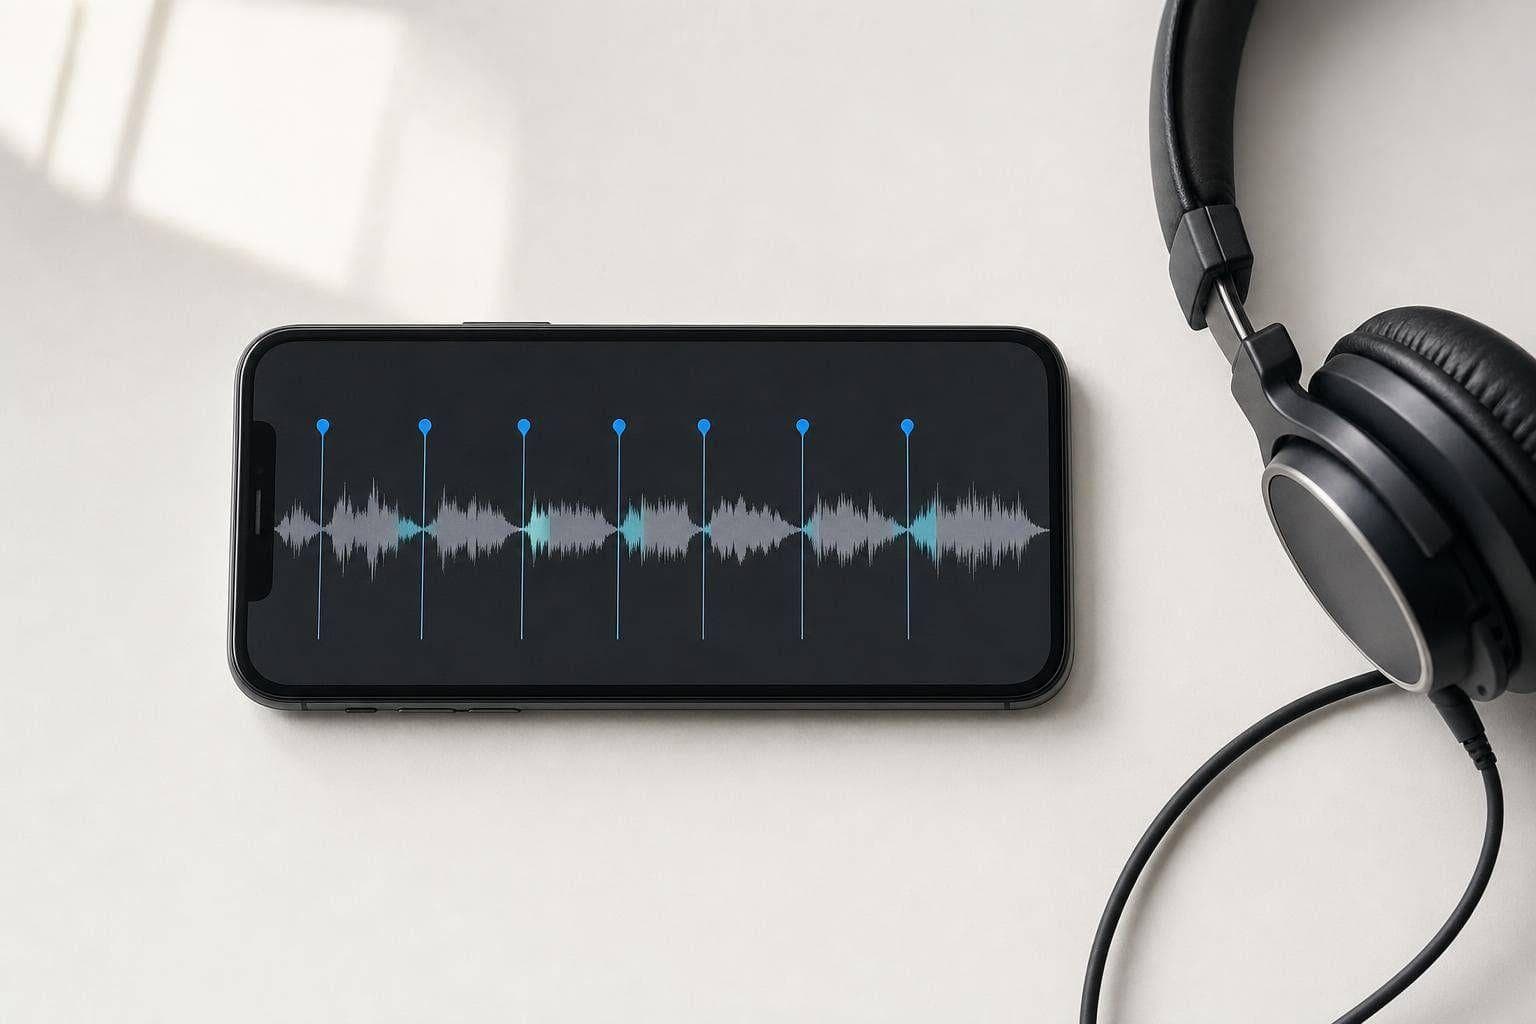
Think of the final mix as your map. Zoom out so you can see the full episode in one view, then scan for pattern changes: dense dialog sections, quieter parts, and flat stretches of silence. Intro music often looks more even and a bit louder than speech. Ad reads tend to bring a different pace and tone. Back-and-forth interview talk usually shows up as uneven, choppy peaks. In many cases, those visual cues will show you where most chapter breaks belong before you even hit play.
Use Visible Transitions and Short Listening Checks
When you find a likely boundary, listen to 10 seconds before and 10 seconds after it. The goal is simple: make sure the chapter doesn't begin in the middle of a word or a few seconds after the new topic has already started. If needed, shift the marker to the start of a clean opening sentence. Each check should only take about 20–30 seconds.
Adjust Boundaries for Clean Spotify Chapter Starts
After the first pass, fine-tune each start point. Often, a small 0.1–0.3 second move is all it takes to avoid clipped plosives, stray breaths, or a chopped syllable. If a boundary comes after a music sting, place the chapter start at the end of the sting's decay so the listener lands on clear speech. And those short bridge lines - like "Okay, moving on" - usually sit better at the end of the previous chapter than at the start of the next one.
If a segment runs under 30–60 seconds and only adds context to a nearby point, fold it into the chapter around it. For a typical 60-minute conversational podcast, 4–10 chapters is a solid range for listeners. A string of 1–2 minute micro-chapters tends to create more tapping than help, and the chapter list starts to feel crowded fast.
Use Auto-Cut as a Starting Point When It Fits
If your recording has clear pauses between segments, silence-based detection can give you a head start. AudioMultiCut has an Auto-Cut feature that scans for quiet stretches and suggests cut points with presets like Podcast Clips and Lecture Chapters. It's handy for a first draft, not the last word.
After it finishes, review each suggested boundary one by one. Merge or adjust any point that doesn't land cleanly. For heavily produced shows with constant background music, or for hosts who barely pause, manual placement from the waveform is usually the safer bet.
Once the rough cuts are in place, move on to naming each chapter and exporting them together.
Name Segments and Export All Chapter Clips in One Pass
Once your boundaries are set, turn them into labels and timestamps in the same session.
Naming each segment does two jobs at once: it builds your chapter list and gives you review clips without extra back-and-forth.
Write Short Chapter Titles That Work on Spotify
Keep chapter titles short and plain. Labels like Intro, Guest Interview, Listener Q&A, Sponsor Break, and Outro are easy to scan on a phone screen and turn into clean Spotify chapter labels. Skip emojis, ALL CAPS, and long descriptions - they slow people down. If your show uses recurring segments, stick with a pattern like "Topic 1: [Subject]" or "Guest Interview: [Name]" so each episode feels familiar.
Write the title and timestamp at the same time so your chapter list stays lined up.
Record Timestamps While You Label Each Segment
As you label each segment, write its start time next to the title. Use MM:SS for episodes under an hour, like 04:05, and HH:MM:SS for longer episodes, like 01:12:45. A basic text file is enough:
00:00 Intro
02:15 Sponsor Break: Brand Name
04:05 Guest Interview: Dr. Lee
24:30 Listener Q&A
35:10 Outro
That file becomes your chapter list. Pull each timestamp from your editor’s playhead readout, then update the times if you make cuts after this step.
When the list is done, export all clips in one batch.
Batch Export From One Session Instead of Trimming Repeatedly
Trimming and exporting each segment one by one is slow and easy to mess up. A batch export workflow works better: set all boundaries first, name everything, then export the whole set at once.
AudioMultiCut is built for this exact workflow. Load the full episode, mark your segments, name each one, and batch export every clip as MP3 or WAV files - already named and ready to use. The free browser app processes everything locally, so your audio stays on your device. You can use those clips to check clean starts, get guest approval, or pull a highlight.
Add the Chapters to Spotify
Once your chapter list is set, add it to your Spotify-facing metadata. The goal is simple: publish one audio file and attach the chapters as metadata.
Add Timestamp Lines to the Episode Description
Take the chapter list you just made and turn it into Spotify-readable markers. In most cases, that means pasting the finished list into the episode description in your podcast host.
Use one line per chapter. Put the timestamp first, then the chapter title:
00:00 Intro
02:35 Guest Introduction
08:10 Early Career
18:45 Main Topic: Remote Work
35:20 Lightning Round
45:55 Outro
A few small details matter here:
- Keep the lines in the right order
- Start the first chapter at
00:00 - Include at least 3 chapters
- Leave at least 30 seconds between chapters
If your host supports RSS chapters, use that same list there instead of pasting it again into the show notes.
Use RSS Chapter Metadata if Your Host Supports It
Some podcast hosts include a built-in chapter editor. You enter each segment’s start time and title, and the host adds that data to your RSS feed for Spotify.
When that option is available, you don’t need to repeat the timestamps in the episode description.
If you swap out the audio file or make major edits after publishing, go back and fix the chapter times so they match the final version. Even a 10- to 20-second shift can knock the later chapters out of place.
Check the Published Episode in Spotify
After the episode goes live, make sure Spotify picked up the chapters the way you expected. Open the episode in both the Spotify mobile app and the desktop app. Then check two things: that the chapter list shows up, and that each tap or click lands on the right moment.
If the chapters are missing, look at the basics first: timestamps, line breaks, and whether the feed has updated.
Conclusion: A Faster Chapter Workflow From One Recording
The rule is simple: load the final file, mark the boundaries, name each section, and write down the timestamps. Then turn that list into Spotify chapter metadata. Instead of trimming and exporting over and over, you do one last waveform review and move on.
After export, the final step is turning those timestamps into Spotify chapters. Use the checklist below so the process stays consistent from episode to episode.
Key Points to Carry Into Your Next Episode
- Final mix first. Chapter planning always comes after the locked edit, not a rough cut. If you add a sponsor read late or re-edit a section, every timestamp after that point shifts.
- Use the waveform and your ears together. Spot likely boundaries in the waveform, then play 3–5 seconds before and after each one. Move the marker until the first words sound clean and deliberate.
- Keep titles short and plain. If someone is scanning the chapter list on a phone, they should get the point right away.
If you want to check sections or pull social clips from the same boundaries, such as [making a podcast audiogram] (https://audiomulticut.com/articles/how-to-make-a-podcast-audiogram), AudioMultiCut lets you place all markers on one waveform, name each segment, and batch export in one pass. Spotify chapters still link back to the single full file you upload.
One long recording can become chapter-ready segments in one pass. Use this as your end-of-episode checklist: final mix → waveform review → boundaries → names → timestamps → Spotify description.
FAQs
Do Spotify chapters need separate audio files?
No. You don’t need a separate audio file for each chapter.
With AudioMultiCut, you can upload one long recording and mark multiple chapter segments in the same session. From there, you can fine-tune the start and end points, preview clip edges, and batch export the sections you want.
That means you can skip doing the same trim-and-export routine over and over for every chapter.
What if I edit the podcast after making timestamps?
With the AudioMultiCut workflow, you usually don’t need to edit the full file first before setting timestamps.
In most cases, it’s faster to split the audio first and then clean up only the exported clips that need work.
If a clip has a pause, filler, or mistake, fix that file only. And if you want to normalize audio or add audiograms, do it after the clip is final.
That order saves time and keeps you from doing extra work on parts you may never use.
Should I use the description or RSS for chapters?
No. In most cases, you shouldn't use an RSS description for chapters.
Instead, use AudioMultiCut to split one long recording into separate, named clips. You can mark each section right on the waveform, give it a clear name, and batch export everything at once.
That gives you clean, shareable audio files for each chapter without relying on manual timestamps or extra descriptions.
Related articles
Cut your recording into clean clips
Upload an audio file, mark the parts you want, preview every cut, and export the finished clips.