
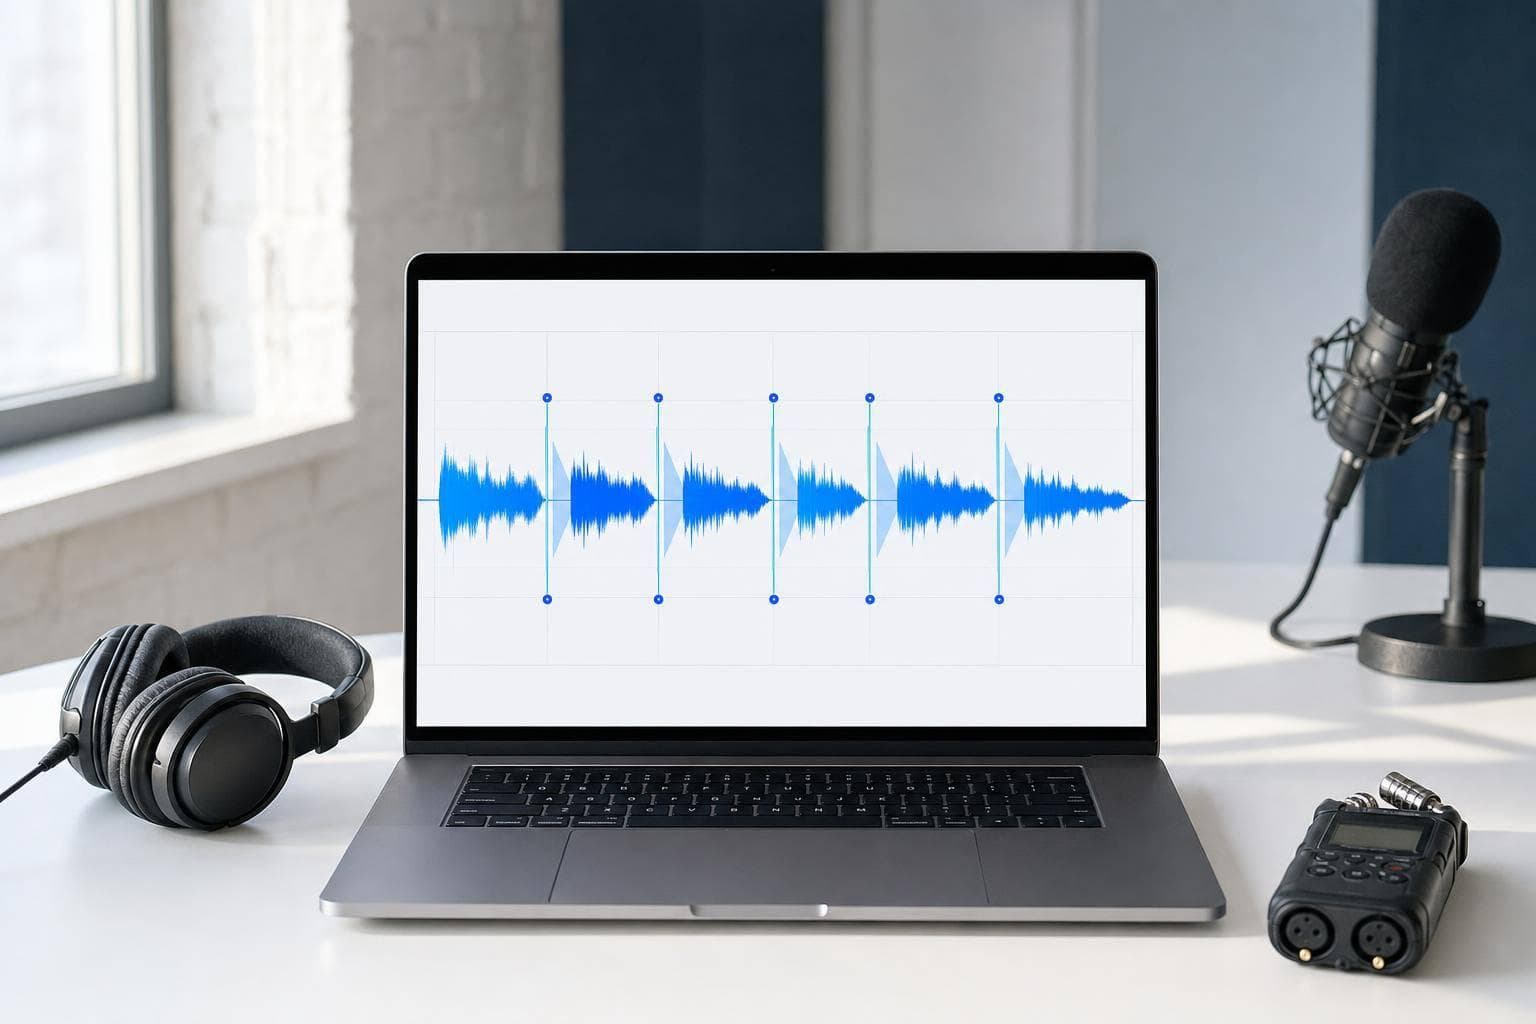
Split Podcast Raw Audio into Segments
If I split one long podcast file before I start editing, I save time on every later step. Instead of trimming the same 45-minute or 90-minute recording again and again, I mark cut points once, export each part in one batch, and work from clean files.
Here’s the short version:
- I open the full recording as one waveform
- I mark the start and end of each part:
- intro
- topic sections
- ad reads
- breaks
- outro
- I review each cut so words, breaths, and music do not get chopped
- I add short fades, about 5–20 ms, to stop clicks
- I batch export each segment as its own file
- I use WAV for editing, and I keep the source sample rate the same, such as 48 kHz
- I keep the raw file untouched in case I need to export again later
That means I end up with files like S03E45_01_intro.wav and S03E45_03_ad_midroll_sponsorA.wav instead of one giant file that slows me down.
A few plain rules matter most:
- Use manual cut points for structure
- Use auto-split silence detection only as a rough pass
- Name clips before export when possible
- Keep folders simple:
Raw/,Segments/,Mix/,Final/ - Save MP3 only for review copies, not edit masters
If I recorded on an iPhone or in a browser-based setup, a multi-cut tool can split many sections in one pass. That is often a better fit than exporting one selection at a time in a standard editor.
So the core idea is simple: map the episode once, export once, then edit with small, labeled clips instead of one long raw file.
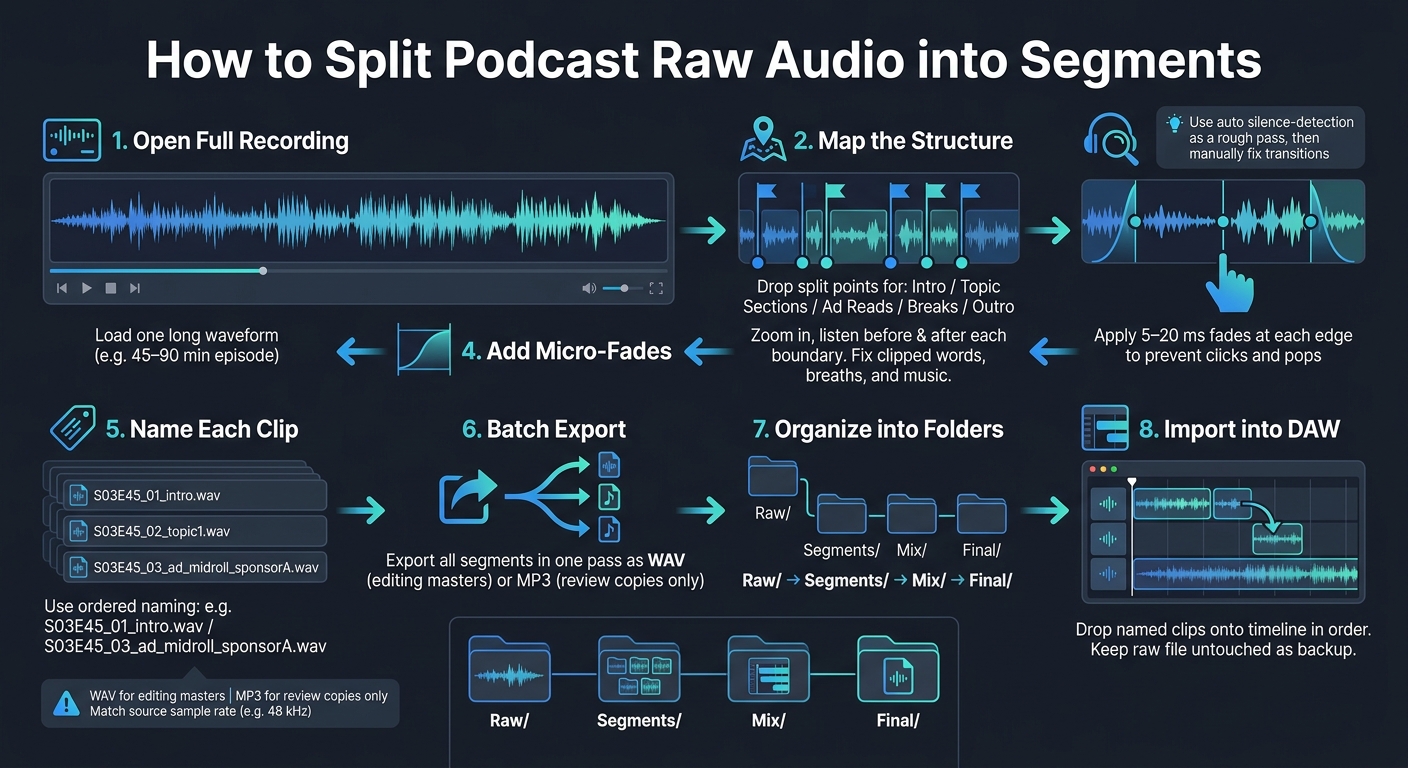
How to Split Podcast Raw Audio into Segments: Step-by-Step Workflow
Choose a tool that splits many segments in one pass
Standard audio editors usually work with one selection at a time. On a long podcast episode, that turns into the same highlight-and-export routine over and over for each segment. It gets old fast.
That’s why a multi-clip splitter makes sense for pre-editing a long episode.
Browser and iPhone workflows for one long waveform
For podcast raw audio, use a tool made for one long waveform with many cut points.
AudioMultiCut does exactly that. You open one long waveform, mark each boundary for the intro, topic, ad, break, and outro, name each clip, and then batch export everything as MP3 or WAV. All processing happens locally on your device. This same privacy-first approach works well when you need to split meeting recordings into highlights. Use it to split the episode, then move those clips into a DAW for mixing and final polish.
On iPhone, the app supports saved projects, import from Voice Memos, Files, and Photos, plus batch export. If you recorded on your phone, this gives you a clean one-device workflow before you move files to your computer.
Once the clips are exported, check each cut point before you move on.
When to move the clips into a DAW after splitting
After export, open the named clips in your podcast editor for assembly, cleanup, and loudness work.
sbb-itb-9696877
Mark intro, topics, ads, breaks, and outro on the waveform
When you have one long waveform open, use the first pass to log the structure, not to edit. Play the episode at normal speed, or a bit faster, and drop a split point each time you hear a clear boundary. At this stage, you're not trying to make perfect cuts. You're just mapping the shape of the episode.
Mark the intro music, topic starts, sponsor reads, transitions, and the outro.
Place manual split points for the main structure
After you've roughed in those boundaries, zoom in and check each one with both your eyes and your ears. Find the spot where speech begins after a pause, then place the split just before that point. For music, look for the fade-out and place the split after it settles.
Then do a quick listen check. Play a few seconds before and after each boundary. If the new clip feels like it starts too sharply, move the start point a little earlier. That small tweak can make the clip sound much more natural.
As you work, name each clip with a steady pattern such as ep045_intro.wav and ep045_topic_01.wav. In AudioMultiCut, you can assign those names right on the waveform before batch export, so you don't have to rename files later.
Once the main boundaries are in place, use auto-cut only for the obvious pauses.
Use silence detection as a starting point, then review the cuts
Silence-based auto-cut works well as a rough pass, but it shouldn't be the final word. Go back and fix false splits, missed transitions, and tiny fragments. Hosts often move from one topic to the next without a clean pause, and mid-roll ads spoken over background music usually won't show up as silence at all.
That's why the mixed approach works so well: auto-cut handles the plain breaks, and manual splits catch the smooth transitions. You end up with a clean, labeled set of clips without all the repetitive trimming you'd face if you relied on just one method.
Once the structure is marked, move to boundary checks and batch export.
Check boundaries and batch export clean clip files
Once the structure is mapped, do one last quality check before export. Go cut by cut and fix clipped breaths, half-words, and any music that gets chopped too early. Add short 5–20 ms fades at each edge so cut points don't click or pop. Then export one clean clip per segment.
Only merge clips when they belong to the same logical block. If sponsors, topics, or breaks are separate, keep them separate. Strip out silence or background noise before export. After the clips are clean and split the right way, export them together.
Batch export the finished clips in one pass as clearly named MP3 or WAV files.
Pick export settings for editing
For editing masters, export WAV, not MP3. WAV is lossless, which means later EQ, compression, or noise reduction in your DAW won't pile lossy artifacts on top of an already compressed file. Match the sample rate to the source recording too. If the raw file is 48 kHz, export the clips at 48 kHz so you don't run into resampling problems when you drop them onto the timeline.
Save MP3s only for review copies. For example, you might send an ad read to a sponsor for approval or share a rough topic clip with a co-host. Mark those files clearly with a suffix like _review or _ref so nobody confuses them with editing masters.
Keep file names and folders simple enough to reuse
A steady folder setup makes life easier every time you come back to an episode. Use these four folders:
Raw/Segments/Mix/Final/
For file names, use an ordered prefix so clips sort the right way in any file browser: S03E45_01_intro.wav. For ad files, add the sponsor name to make swaps easy: S03E45_03_ad_midroll_sponsorA.wav. And leave the raw file untouched, so you can always go back to the source later.
Bring the split clips into your podcast editor and keep the original file safe
After batch export, bring the clips into your editor and build the episode. Import everything, then drop each clip onto the timeline in the right segment order. If you used file names like 001-intro.wav and 010-topic-01.wav, they’ll sort in order in almost any import window or file browser.
Pre-split clips make editing a lot faster. You can move topic sections around - or cut one out - by shifting a single clip instead of digging through one long file. Ad reads stay separate too, which makes it much safer to swap a sponsor spot without cutting into the dialog around it.
That setup also helps when you’re making more than one version of the same episode. A full episode, a highlight reel, and a short social clip can all use the same pre-split files, so you don’t have to cut the same material again.
Once you lock the episode order, save your standard clips in a separate folder so the next episode is easier to put together. Store reusable intros, outros, and recurring ad reads in a shared Podcast-Assets/ or Ads/ folder, then import them only when you need them.
Keep the raw file untouched. If you need to revise the edit later, go back to that source file and export again from there.
FAQs
When should I split a podcast before editing?
Split it before cleanup, normalization, or publishing polish.
First, isolate the exact parts you want to keep: intro, topics, ad spots, breaks, and outro.
Then export only those segments and clean just the clips that need it.
That saves you from applying loudness fixes to the whole episode, where one spike or mic bump can throw off the rest, and it keeps the edit moving faster.
How do I avoid cutting off words or breaths?
Use the automatic boundary preview.
In AudioMultiCut, when you change a segment’s start or end point, the app instantly plays just the first or last second you edited.
That means you can hear the exact edge of the cut right away. No need to replay the whole clip every time you make a small tweak.
It’s a simple thing, but it saves time. More than that, it helps you dial in cleaner edits while keeping speech sounding natural and smooth.
Should I export podcast segments as WAV or MP3?
Use MP3 for sharing, quick follow-up, and general distribution. It’s the easy, no-fuss option when you just need to send a clip and move on.
Choose WAV only if the clip is headed into more editing, pro production work, or sample mapping. If you might tweak the audio later, like using normalization or compression to fix quiet or uneven levels, WAV gives you a better place to start.
Related articles
Cut your recording into clean clips
Upload an audio file, mark the parts you want, preview every cut, and export the finished clips.